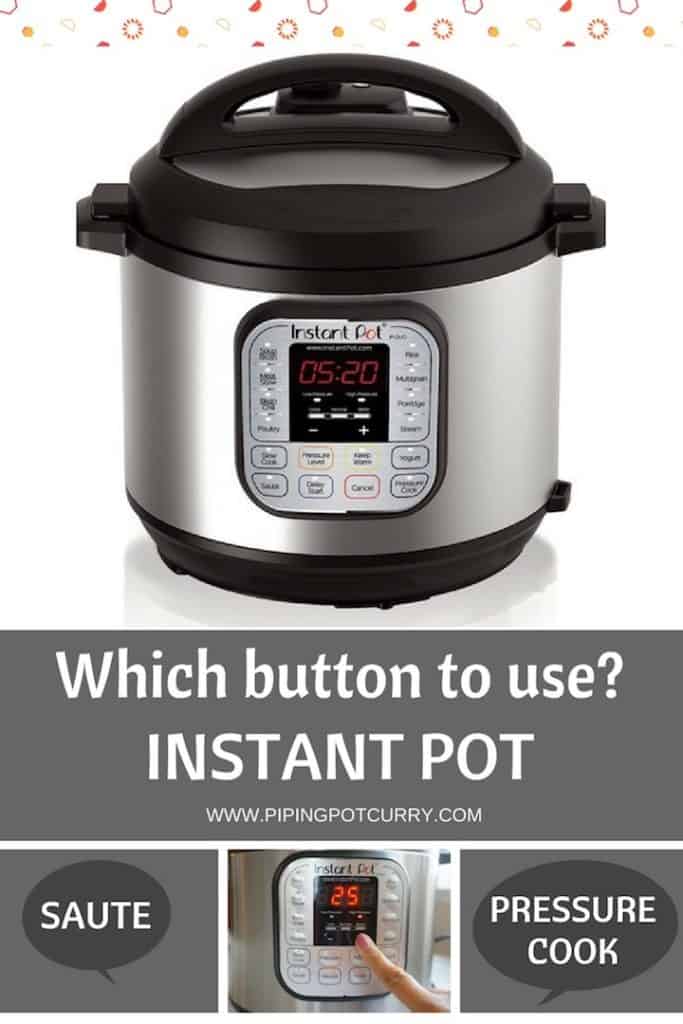
If you have not opened your Instant Pot yet or have not done the water test, check out the Instant Pot Beginner Starter Guide.
What are the various Instant Pot Buttons?
We will go through the following:
Main Buttons Pre-programmed buttons
Main Instant Pot Buttons
1. Manual or Pressure Cook Button
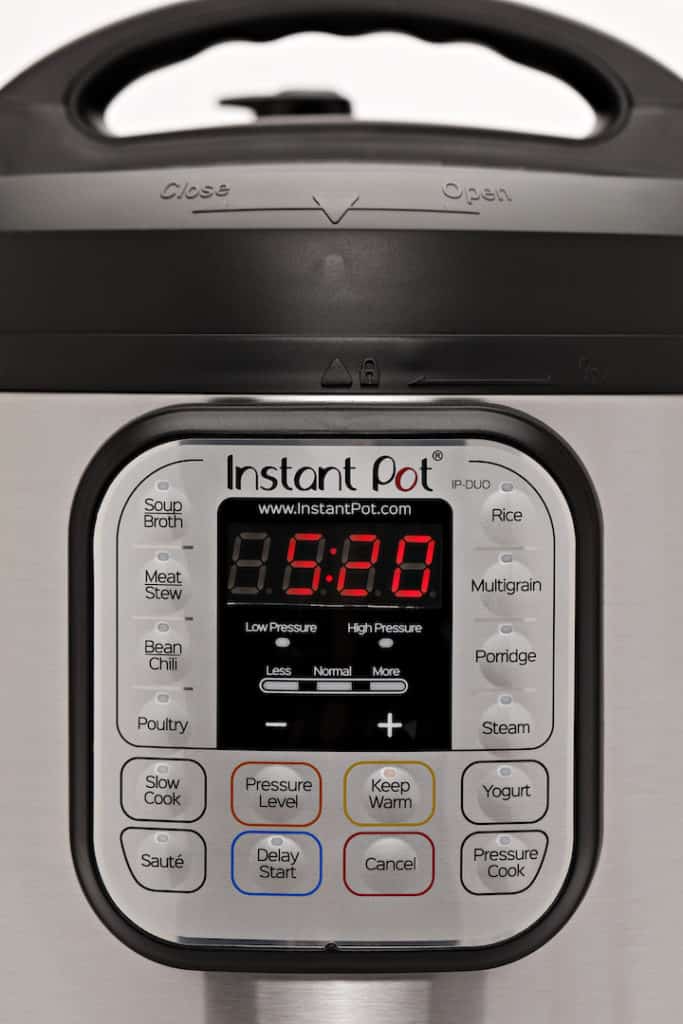
This is the mode you will use most frequently on your Instant Pot (bottom right corner). This is the main button to pressure cook any dish. Most recipes you will find online use the Pressure Cook button. Press “Pressure Cook” button, then “+” or “-” to set the time to pressure cook. The maximum time you can pressure cook is 240 minutes. Note: In old versions and models, the button was called Manual and in newer models it is rightly called “Pressure Cook”.
2. Pressure Level Button
This button is to switch between high and low pressure cooking. Press “Pressure Cook” button, then “Pressure Level” to switch.
3. “+” and “-” Buttons
These buttons are used to increase or decrease the cooking time.
4. Sauté Button
This is the mode to Sauté or brown food in the Instant Pot (bottom left corner). Sauté with the lid open or with a glass lid. This is one of the main advantages of the instant pot, that you can sauté and cook directly in the same pot. This is the second most frequently used mode. Sauté mode defaults to 30 minutes. After 30 minutes, the mode is canceled. I use this mode in my Carrot Pudding recipe, and it makes cooking the pudding so much easier without much monitoring.
5 Adjust Button
This button helps to adjust between the “Normal” (Default), “More” or “Less” setting for Sauté mode depending on how high you want the temperature. Press “Saute”, then “Adjust” to change between them. For newer Instant Pot models with no “Adjust” button, press “Saute” multiple times to change between Less, Normal and More setting.
6. Keep Warm/Cancel Button
Press this button to cancel the operation and switch off the Instant Pot. When the instant pot goes in “Keep Warm” mode, the display shows L0:00 and starts counting up. Did you know? If you want the instant pot to not go in “Keep Warm” mode after the cooking cycle is complete, press the mode you used for cooking twice. eg. When you want to pressure cook and you press the “Pressure Cook” button, you will see the light on for “Pressure Cook” and “Keep Warm” buttons. Press “Pressure Cook” once again (without any time lapse), then “Keep Warm” will turn off.
7. Timer Button
Use this button to set a delay timer for cooking. You can set the delay timer up to 24 hours.
8. Steam Button
Use the Steam function to steam vegetables. Instant Pot increases the temperature quickly on steam mode, hence it is recommended to use a steamer basket or rack to steam and keep it away from the bottom, so it does not burn. With steaming, you also want to release the pressure manually as natural release will most likely overcook the vegetables. For Steam mode, you can adjust the cooking time by pressing “Adjust” (“Steam” for newer models) to change between below settings:
Normal (10 minutes at high pressure) Less (3 minutes at high pressure) More (15 minutes at high pressure).
9. Rice Button
This is the default mode to cook white rice. It is set to low pressure cooking for rice. The pressure cooking time is automatically adjust according to the amount of rice and water in the pot. You cannot use the “Adjust”, “+” or “-” Buttons with this program. To have better control, we prefer the manual/pressure cook mode to cook rice. Here are common rice recipes –
White Basmati Rice (and pot-in-pot White Rice) Brown Rice (and pot-in-pot Brown Rice) Jasmine Rice
10. Slow Cook Button
Use this program to Slow Cook in the instant pot. The preset slow cook program defaults to 4-hours. Press “Slow Cook, then “+” or “-” to change the cooking time. You can change between 30 minutes to 20 hours. To change slow cook temperature, press “Adjust” (“Slow Cook” for newer models) to change between below temperature settings:
Normal (194-205°F) High (199-210°F) Low (190-201°F).
Pre-programmed Instant Pot Buttons
There are a number of pre-programmed modes in the Instant Pot. These are suggested cooking times for common food items. You can do most of the same cook using the pressure cook button too, however these preset settings give a good starting point.
1. Bean/Chili Button
This mode is for cooking beans or chili, or chickpeas. Press “Bean/Chili”, then “Adjust” to change between below settings:
Default Normal Setting – 30 minutes at high pressure More Setting – 40 minutes at high pressure Less Setting – 25 minutes at high pressure
We use this mode to make Chana Masala, Cook Chickpeas, Red Kidney Beans and Madras lentils.
2. Meat/Stew Button
This setting is to cook meats that take longer to cook. Press “Meat/Stew”, then “Adjust” to change between below settings:
Default Normal Setting – 35 minutes at high pressure More Setting – 45 minutes at high pressure Less Setting – 20 minutes at high pressure
3. Poultry Button
This setting is to cook chicken. Press “Poultry”, then “Adjust” to change between below settings:
Default Normal Setting – 15 minutes at high pressure More Setting – 30 minutes at high pressure Less Setting – 5 minutes at high pressure
In our experience, 5 minutes works well for chicken cut into pieces.
4. Porridge Button
This setting is to cook porridge and pudding like foods that you want to be cooked at a maintained lower temperature. Press “Porridge”, then “Adjust” to change between below settings:
Default Normal Setting – 20 minutes at high pressure More Setting – 30 minutes at high pressure Less Setting – 15 minutes at high pressure
We use this mode to make Rice Pudding.
5. Soup Button
Make soups using this setting. Press “Soup”, then “Adjust” to change between below settings:
Default Normal Setting – 30 minutes at high pressure More Setting – 40 minutes at high pressure Less Setting – 20 minutes at high pressure
As is obvious, we use this mode to make Hearty Brown Lentil Soup and Minestrone Soup.
6. Yogurt Button
The Yogurt setting is used to make yogurt, pasteurize milk and make Jiu Niang. Press “Adjust” (“Yogurt” for newer models) to change between below settings:
Normal (Make yogurt) More (Pasteurize milk) Less (Make Jiu Niang aka fermented glutinous rice)
The yogurt setting maintains the temperature in this range 106°F – 113°F. For recipe to make yogurt, see the traditional yogurt making process and no-boil/cold ingredients yogurt.
7. Multigrain Button
This setting is to cook mixed grains such as wild rice, beans, etc. Press “Multigrain”, then “Adjust” to change between below settings:
Default Normal Setting – 40 minutes at high pressure Less Setting – 20 minutes at high pressure More Setting – 45 minutes of warm water soaking, then 60 minutes of pressure cooking.
For newer models
8. Egg Button
This setting is to cook extra large eggs. For smaller eggs, adjust cooking time. Press “Adjust” to change between below settings:
Default Normal Setting – 4 minutes at high pressure More Setting – 5 minutes at high pressure Less Setting – 3 minutes at high pressure
9. Cake Button
This setting is to cook cakes and cheesecakes. Press “Adjust” to change between below settings:
Default Normal Setting – 40 minutes at high pressure (Denser moist cakes) More Setting – 50 minutes at high pressure (Lighter moist cakes) Less Setting – 25 minutes at high pressure (Cheesecakes)
10. Sterilize Button
Use this setting to sterilize bottles or their utensils. Not recommended for pressure canning.
Common Insant Pot Cooking Scenarios
Here are 2 common cooking scenarios which you will use most frequently.
Recipe says “Start instant pot and sauté for 3 minutes”. How do I do it?
Press “Sauté” Button. Wait until the indicator says HOT, then add ingredients to can start sautéing.
Recipe says “Cook at high pressure for 5 minutes”. How do I do it?
Press “Manual/Pressure Cook” button. Press “+” or “-” button to change the cooking time.
My Instant Pot does not have a Manual Button. What do I do?
In older models and versions of Instant Pot, the “Manual” button is used to pressure cook. In newer models, “Manual” button is rightly renamed to “Pressure Cook”.
How do I set the timer of the Instant Pot?
Press the “Pressure Cook or another preset program, then press “Timer” and adjust the delay time by pressing “+” or “-” buttons. You can set the delay timer up to 24 hours.
Why does my Instant Pot not have a Yogurt button?
The LUX series of the Instant Pot do not have a yogurt mode. The DUO series has the “Yogurt” mode.
Why does my Instant Pot not have a Poultry button?
The Instant Pot DUO Plus does not have a Poultry preset mode. However, don’t worry; you can still cook using the Manual/Pressure Cook mode.
Why did you not use the Poultry button to make Chicken? Why did you not use the Rice button to make Rice? Why do many people just use the Manual/Pressure Cook button for all recipes?
The Poultry, Rice, Bean/Chili, etc modes are mainly preset modes. What that means is that you can do the same cooking using the manual button, adjusting the pressure level and cooking time. You can still cook the same way even without using the preset buttons. We do tend to lean towards using the Manual/Pressure Cook button more often, as that gives the best control to cook. Now you have gone through and reviewed all the buttons on the Instant Pot. Pin this page for future reference.
Check out other Instant Pot Resources
Instant Pot Beginners Quick Setup Guide Instant Pot Terminology and Acronyms How to Clean your Instant Pot Most Useful Instant Pot Accessories The complete Instant Pot 101 Guide Instant Pot Cooking Times Chart
If you have not already, start cooking and have fun with you new instant pot! Check out 10+ Easy Instant Pot Recipes for new owners. I highly recommend initially following some recipes, rather than making adjustments. Find a trusted website for instant pot recipes, and then follow along. Feel free to ask questions, so you can be successful with your initial recipes. I have 100+ tried and tested Instant Pot Recipes, do check them out. Leave a comment on the recipe or on any social media channel. I always respond to questions/comments.


